For a long time, I wanted to create a single page that truly represented me. At the start of this month, I bought the domain hiteshshetty.com on GoDaddy. Since my name is fairly common, I was worried it might already be taken but fortunately, it was available.
With most of my content ready, I decided to keep the stack simple: Next.js with Static Site Generation (SSG), deployed via GitHub Pages using GitHub Actions.
1. Configure Next.js for SSG
Build settings (next.config.ts)
In next.config.ts, add:
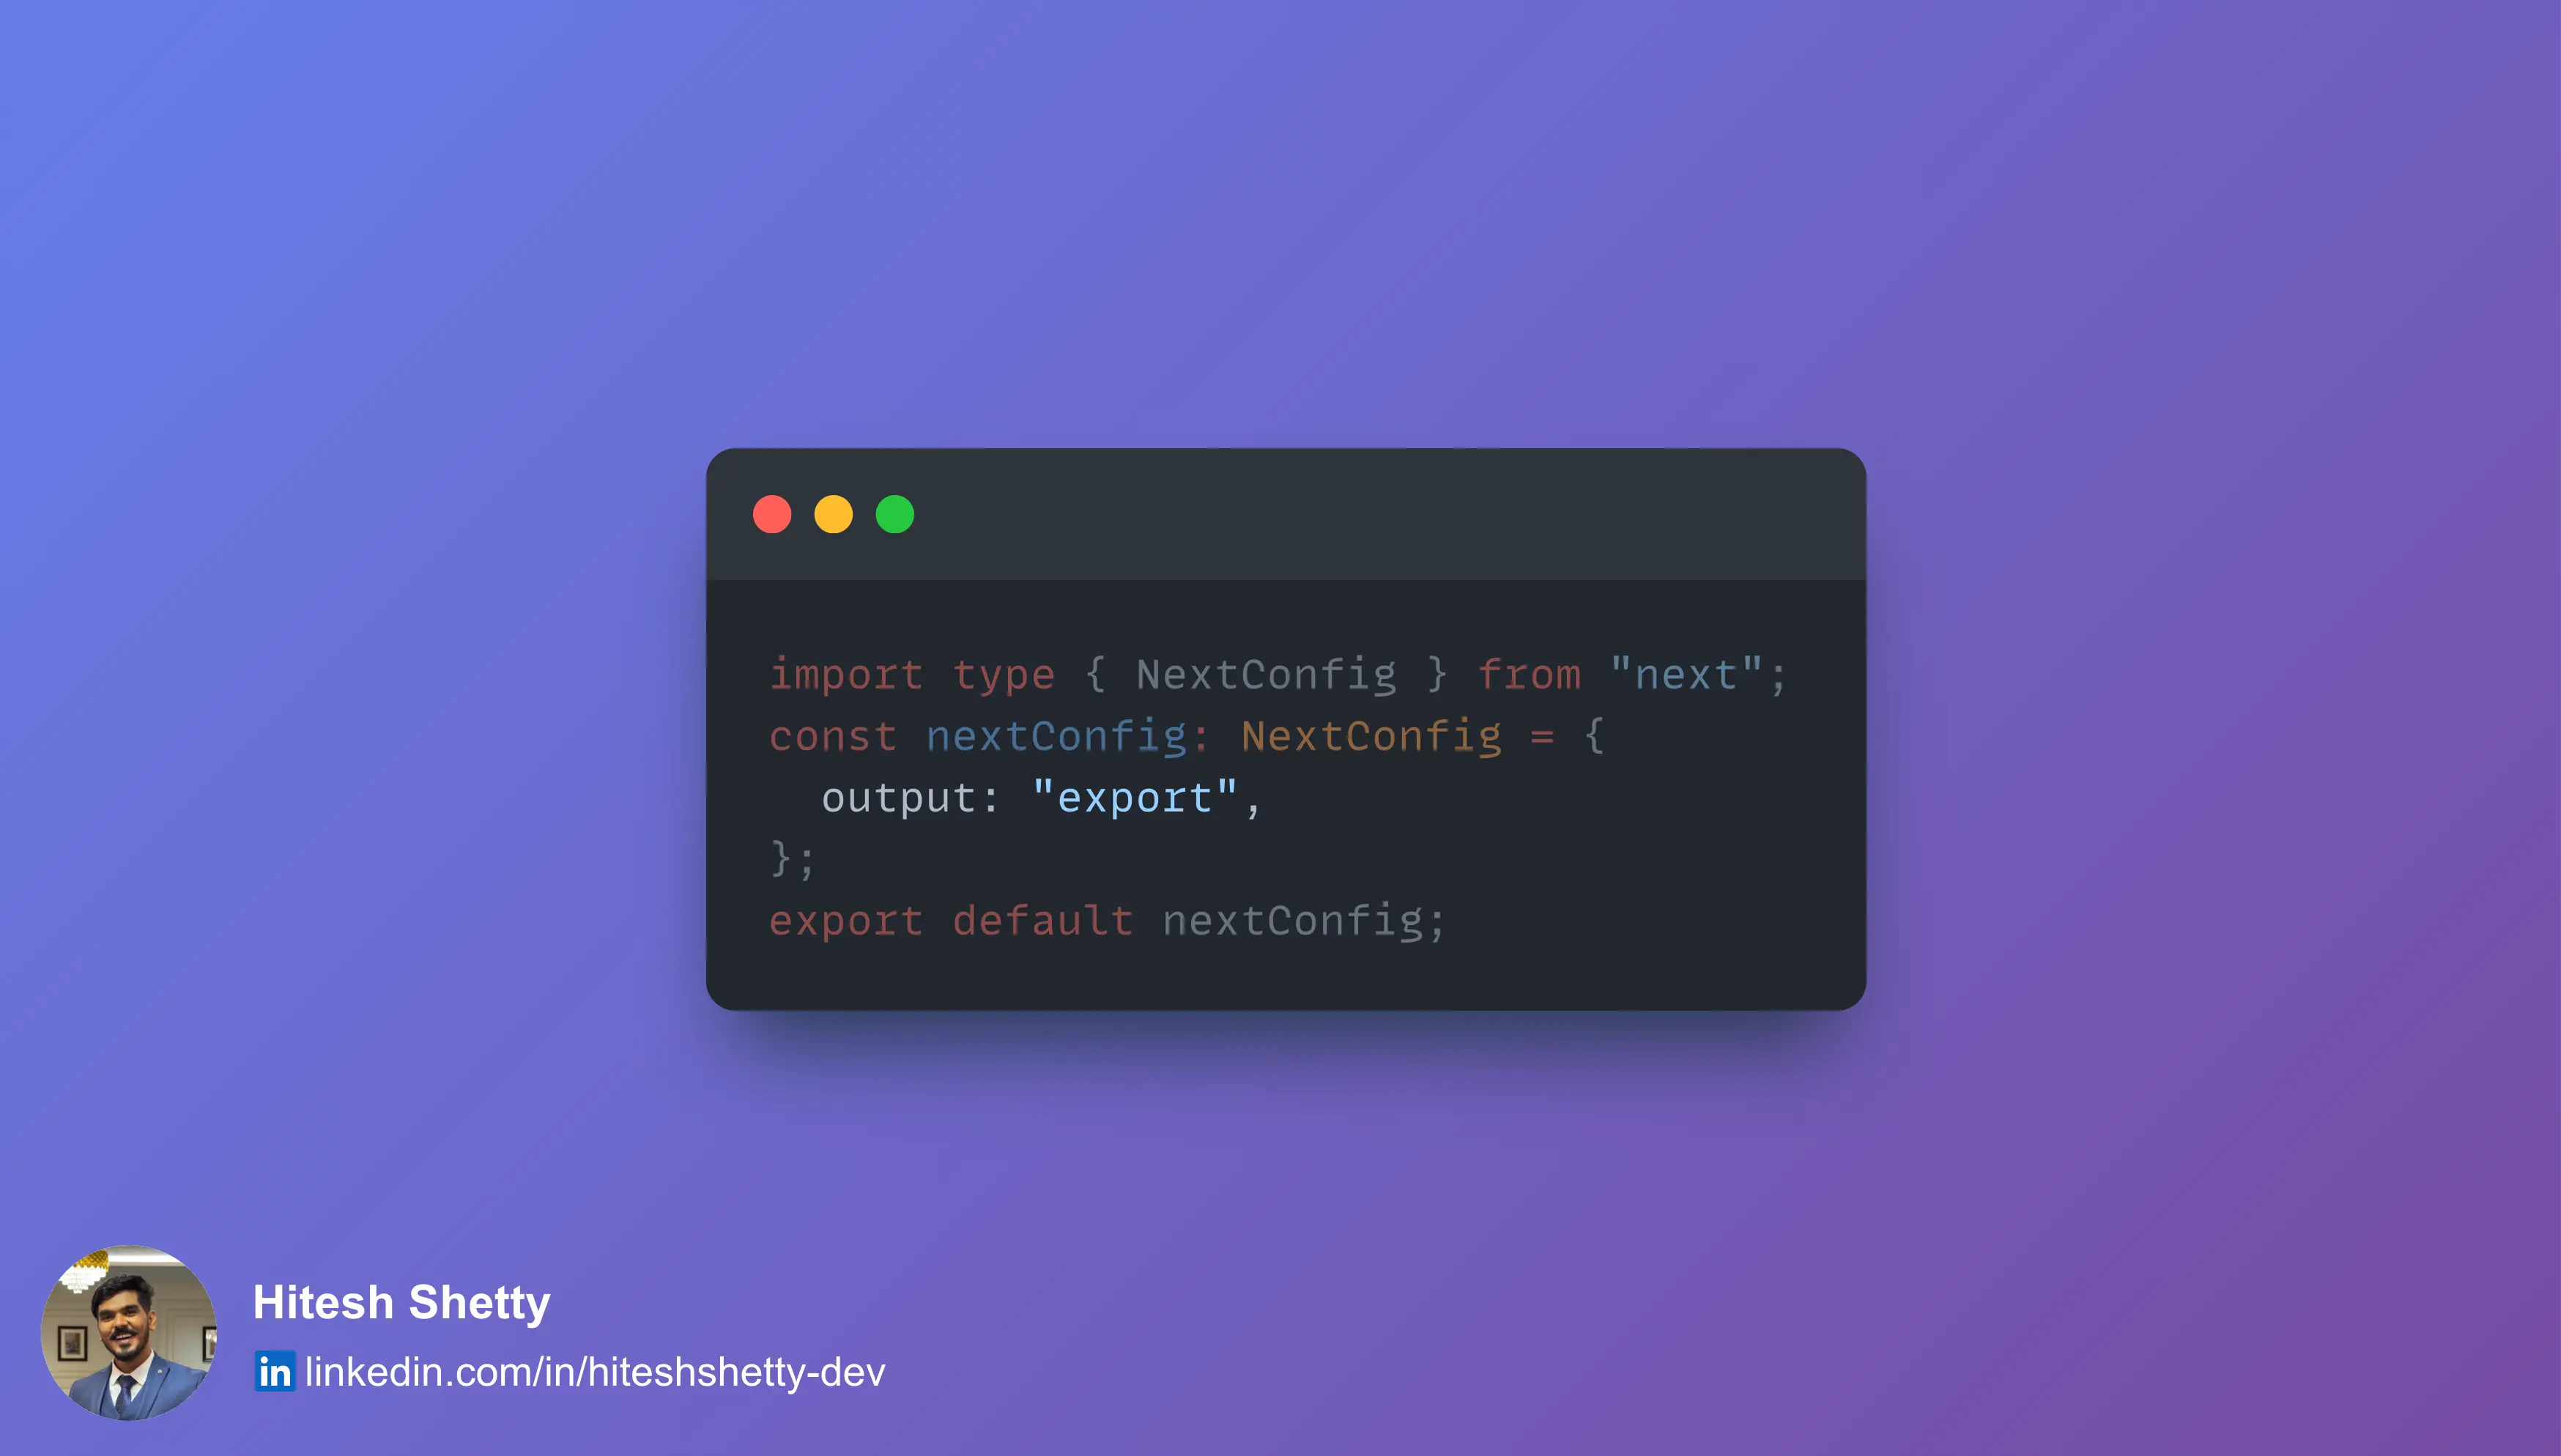
This enables Next.js to export static pages for all routes in the app.
Add a .nojekyll file
Jekyll is a static site generator. It takes text written in your favorite markup language and uses layouts to create a static website.
GitHub Pages runs Jekyll by default, which ignores files and folders that start with an underscore. Next.js outputs assets under /_next, so without disabling Jekyll your CSS and JS will not load.
Create an empty .nojekyll file in public/:
touch public/.nojekyllThat's it, GitHub Pages will skip Jekyll, and your static assets will load correctly.
2. Configure the GitHub repository
Choose GitHub Pages source
In your repository, go to Settings → Pages. Under “Build and deployment,” choose GitHub Actions as the source.
Set up the deployment workflow
You have two options:
- Use a prebuilt GitHub Actions workflow for Next.js Pages:
https://github.com/<username>/<repo_name>/actions/new?category=pages&query=Next
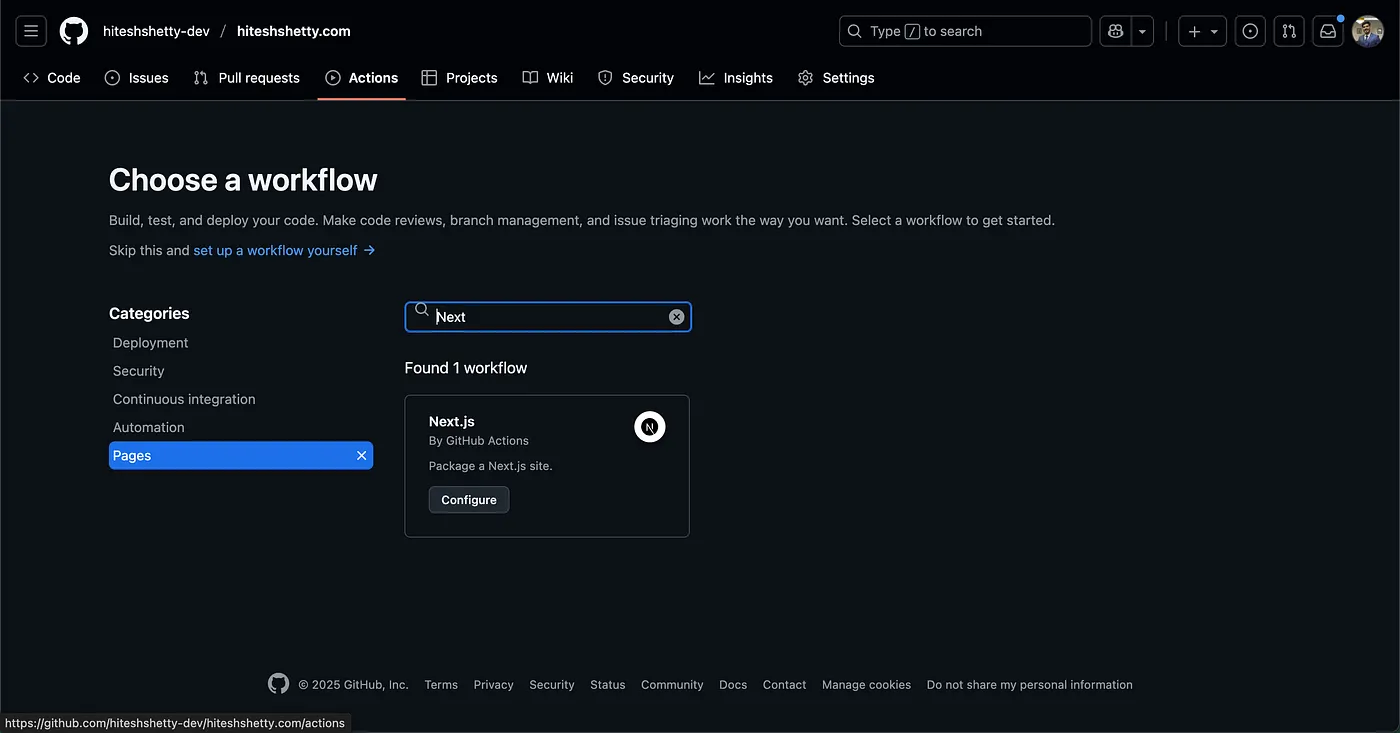
- Or reuse the workflow I used in my repo: deploy.yml
Once the action is configured, any merge to the main branch will trigger a deployment. When it succeeds, your site will be available at:
https://<username>.github.io/<repo_name>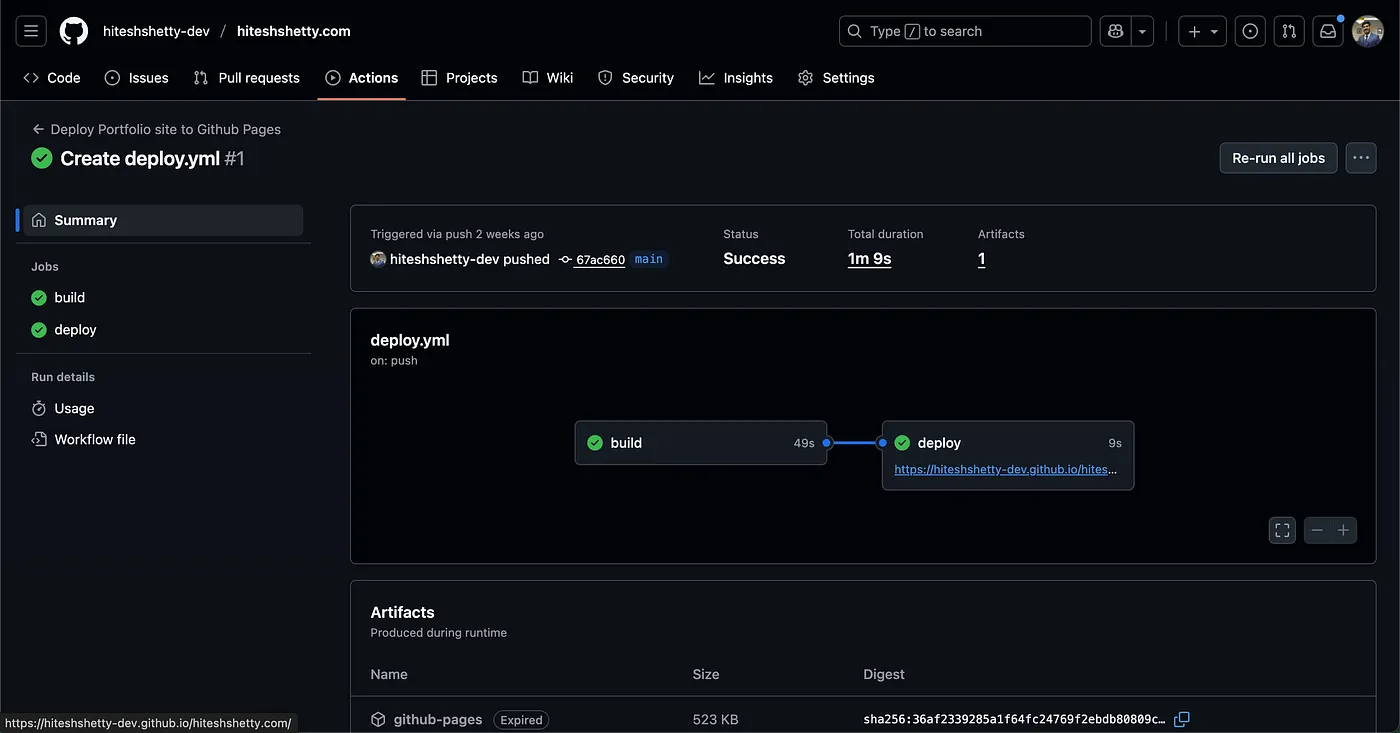
Verify that the site loads and all routes work.
3. Configure a custom domain
Update DNS records at your registrar
Some domain registrars add their own A records to display a landing page until you configure your website. This means they may populate A records that can be safely deleted. I personally spent half an hour debugging random redirects to a landing page while navigating 😭.
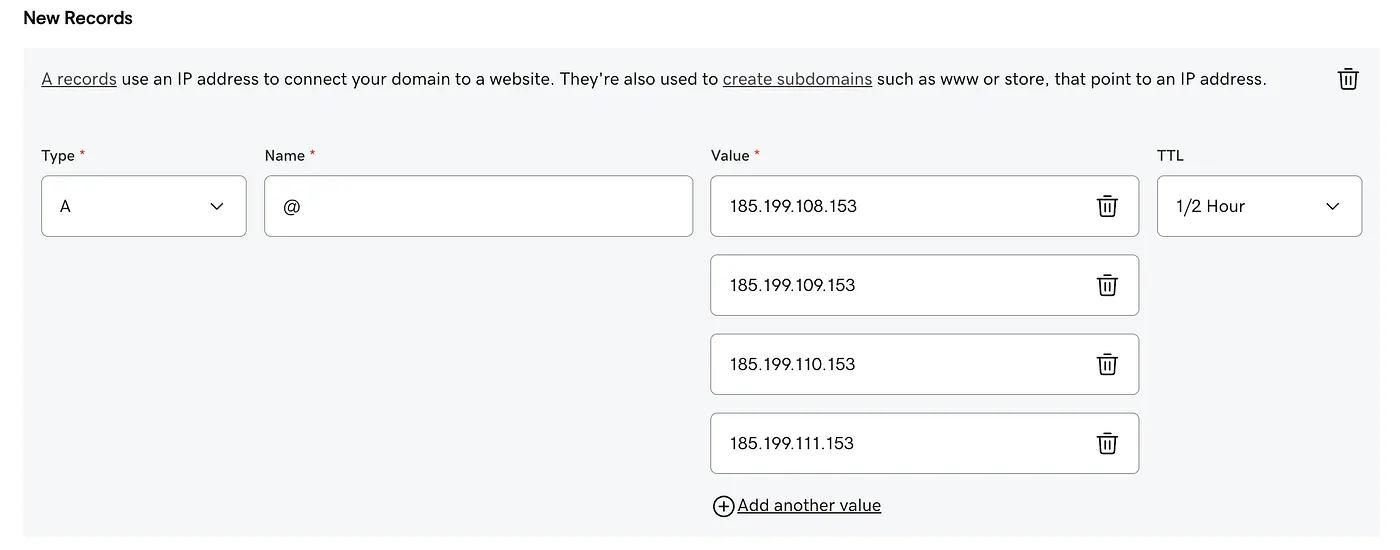
A records for apex (root) domain
An A record (Address Record) is a fundamental type of DNS record that maps a domain name (like hiteshshetty.com) to an IPv4 address (like 185.199.108.153).
When someone types your domain, DNS looks up the A record and retrieves its corresponding IP address. The browser then connects to that IP address to fetch your website.
GitHub Pages IP addresses:
185.199.108.153
185.199.109.153
185.199.110.153
185.199.111.153
Configure these as A records for @ shorthand (or your-domain.com).
CNAME for **www**
A CNAME points one hostname to another. To support www.your-domain.com, add a CNAME that aliases www to your GitHub Pages domain: <username>.github.io.

DNS propagation usually takes around 15 minutes but can take up to 24 hours. You can check propagation with tools like dnschecker.org or via dig command:
For A record:
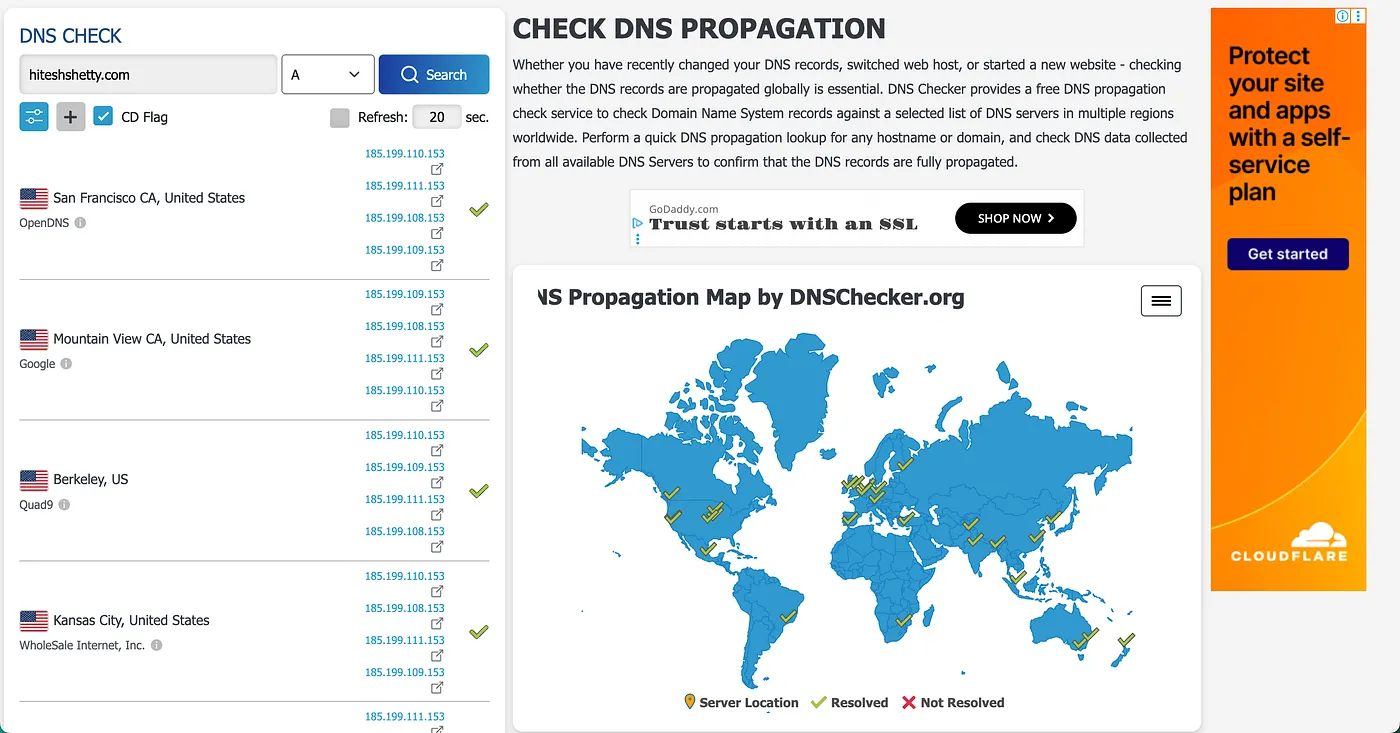
or use the dig command:
dig your-domain.com +noall +answer -t AExample output:
❯ dig hiteshshetty.com +noall +answer -t A

; <<>> DiG 9.10.6 <<>> hiteshshetty.com +noall +answer -t A
;; global options: +cmd
hiteshshetty.com.       338     IN      A       185.199.111.153
hiteshshetty.com.       338     IN      A       185.199.109.153
hiteshshetty.com.       338     IN      A       185.199.110.153
hiteshshetty.com.       338     IN      A       185.199.108.153
For CNAME:
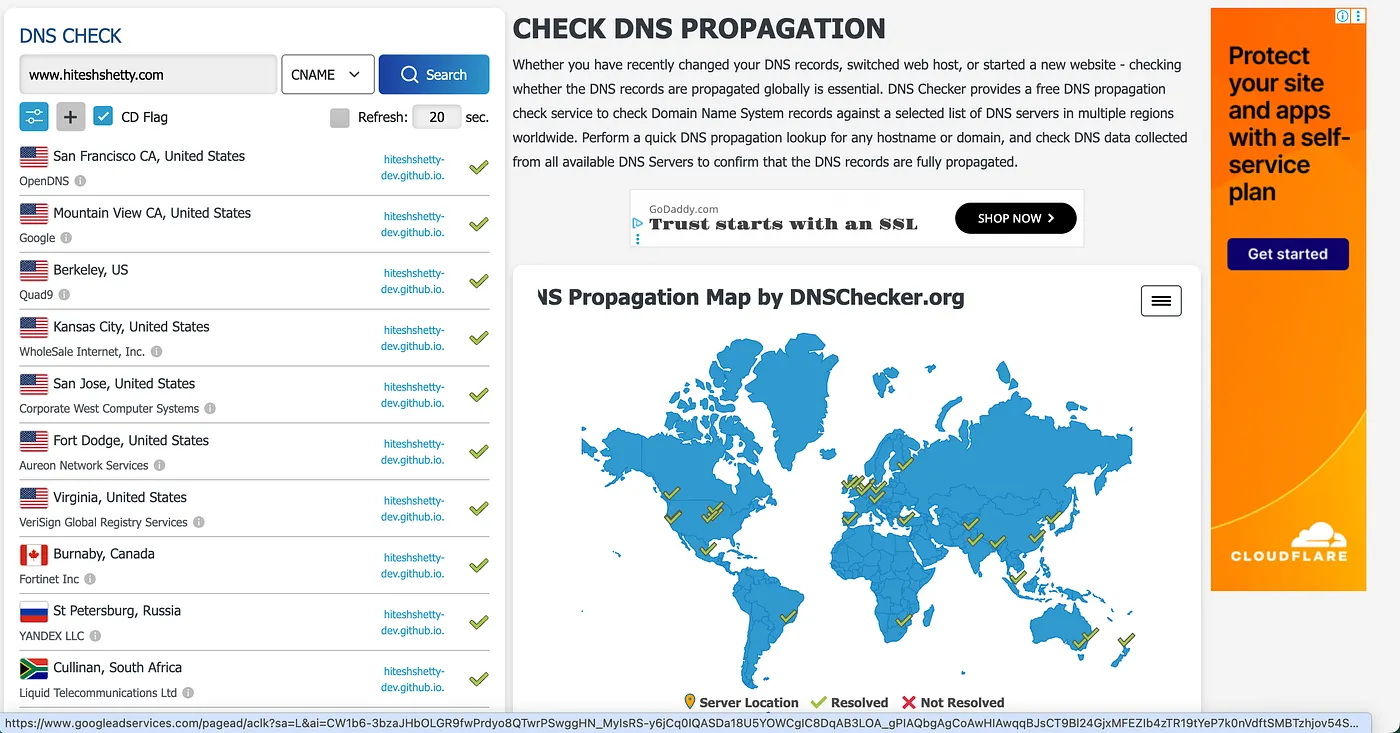
or use the dig command:
dig www.your-domain.com +noall +answer -t CNAMEExample output:
❯ dig www.hiteshshetty.com +noall +answer -t CNAME

; <<>> DiG 9.10.6 <<>> www.hiteshshetty.com +noall +answer -t CNAME
;; global options: +cmd
www.hiteshshetty.com.   3600    IN      CNAME   hiteshshetty-dev.github.io.
Add a CNAME file
Tell GitHub Pages which domain to serve by adding a CNAME file in public/:
echo "your_domain_name.com" > public/CNAMENotes:
- The file must contain only the domain name
- Do not include
http://orhttps:// - No trailing slash
Enable the domain in GitHub Pages
After DNS propagates, go to Settings → Pages in your repo.
- Enter your custom domain and Save
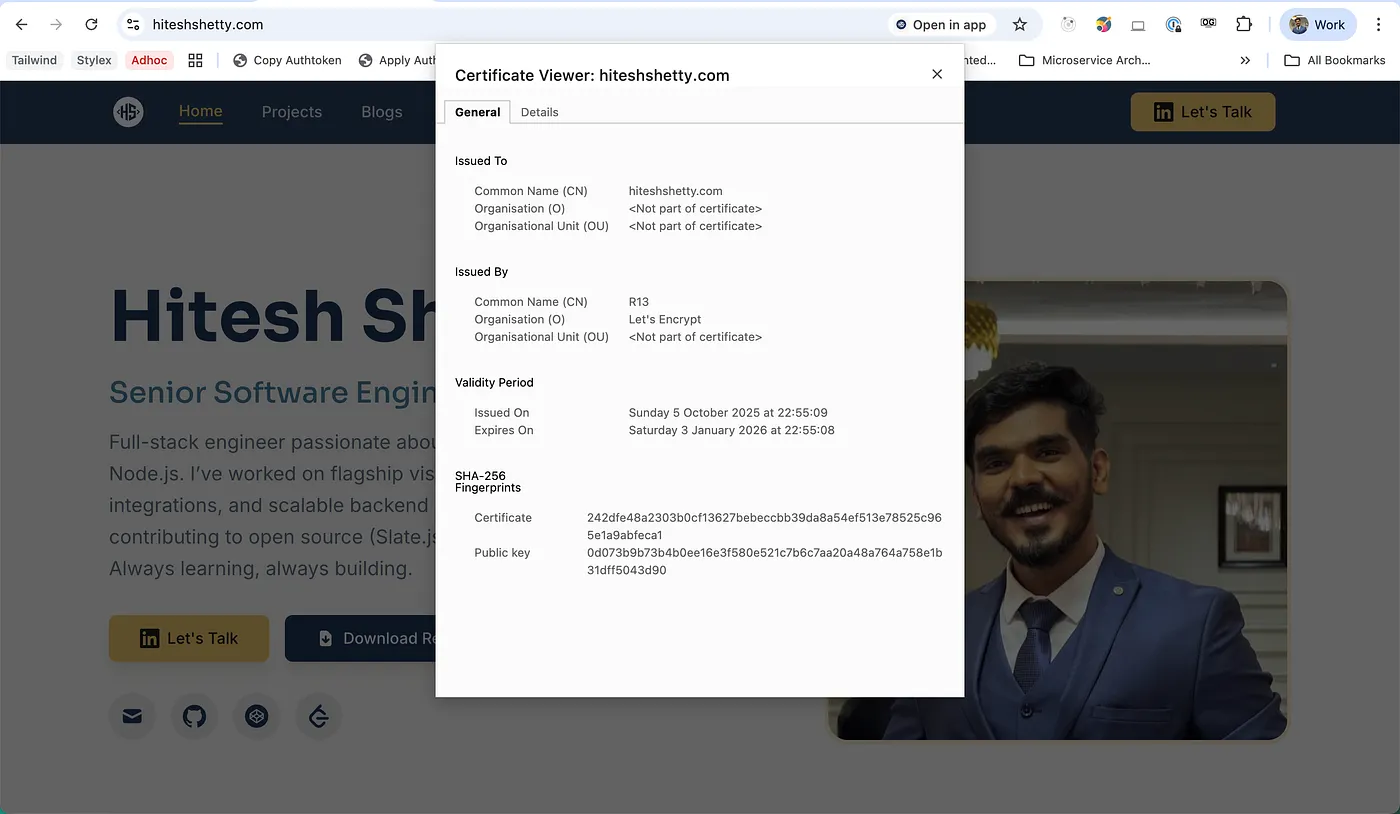
- Wait for GitHub to issue a TLS certificate via Let's Encrypt
- Then enable "Enforce HTTPS"
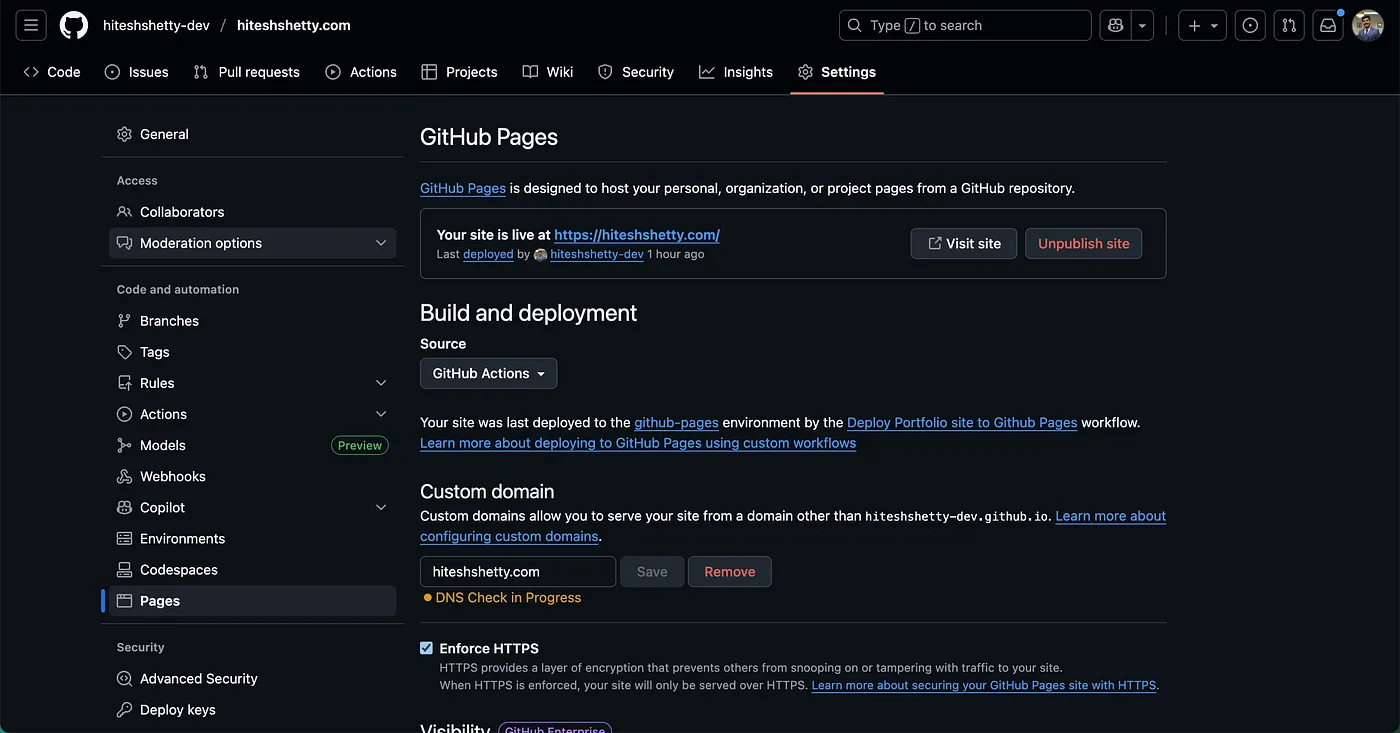
Your site will now be served over HTTPS on your custom domain.
Wrapping Up
You now have a Next.js site deployed on GitHub Pages, with CI/CD via GitHub Actions and a custom domain. Simple setup, fast hosting, and no servers to manage.
If you found this guide helpful, stay tuned! I’ll be sharing upcoming blogs where I’ll cover topics like SEO optimization, metadata and Open Graph setup, and converting your website into a PWA. Make sure to follow for more practical tips and step-by-step guides for building and improving modern web projects.
Also available on Medium
This article is also published on Medium for interaction and feedback.